Crossfading in Windows Media Player 10 is nothing but blending of sounds in such a ways that it delivers a smooth transition between songs in your playlists. Without this crossfading feature turned ON, at the end of each song there will be around 2-3 sec gap before playing the next song. But with the crossfading feature turned ON, transition between songs happens like those done in a professional studio wherein, as the volume at the end of the first song fades out and gradually goes down, the volume of the next song fades in and gradually goes up.
Now let’s know how to modify Windows Media Player 10 settings to enable crossfading between songs.
1. Open Window Media Player 10 and for our testing purpose add any two songs to your Now Playing List.
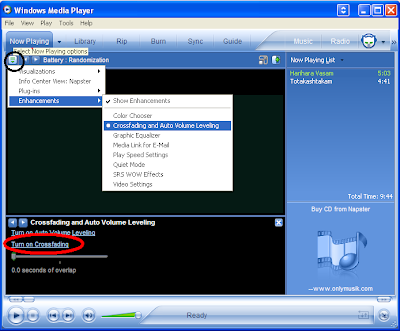
2. Click the Select Now Playing options button under Now Playing and point to Enhancements, and then select Crossfading and Auto Volume Leveling as shown in the screen shot below.

Turn on Crossfading in Windows Media Player 10
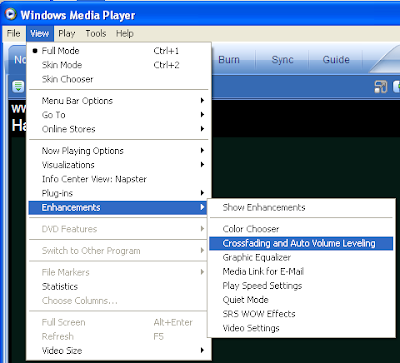
Alternatively you can access Crossfading and Auto Volume Leveling option from Enhancements under View Menu

View -> Enhancements -> Crossfading and Auto Volume Leveling
3. Now, from the Crossfading and Auto Volume Leveling Enhancement pane that appears just above the player controls, click the Turn on Crossfading link and move the slider below that to adjust the time(secs) of overlap.
That’s it!! Now, your music files will be playing using the amount of crossfading you have chosen which you can check with the tracks you have added to your Now Playing list.