Since July 29, 2015, the time that Windows 10 final version was released, Windows 10 operating system has gradually become the main Windows OS on Desktop and laptop. To protect your treasure data, please backup your Windows 10 operating system on regular basis just in case the Windows 10 fails to boot. If you did not create a system image backup, and if you can’t fix it you will lose everything.
Here, we will show you how to create a system image backup to protect your data and precious memory.
Windows 10 provides you two backup software to protect data: File History, Backup and Restore. File History only backup your files; Backup and Restore backup your data files and partitions, and system files. In fact, there more than 3 solutions to create a system backup, and we just show you the following three:
- Create a system image.
- Create a restore point.
- Create system backup with AOMEI backupper.
Note: Please prepare an external hard drive and connect it to the computer to save the Windows 10 system image file.
Method 1: Create a System Image
Windows 10 has the feature to create a system image, here is the steps:
Step 1. Please input backup settings, and hit enter.
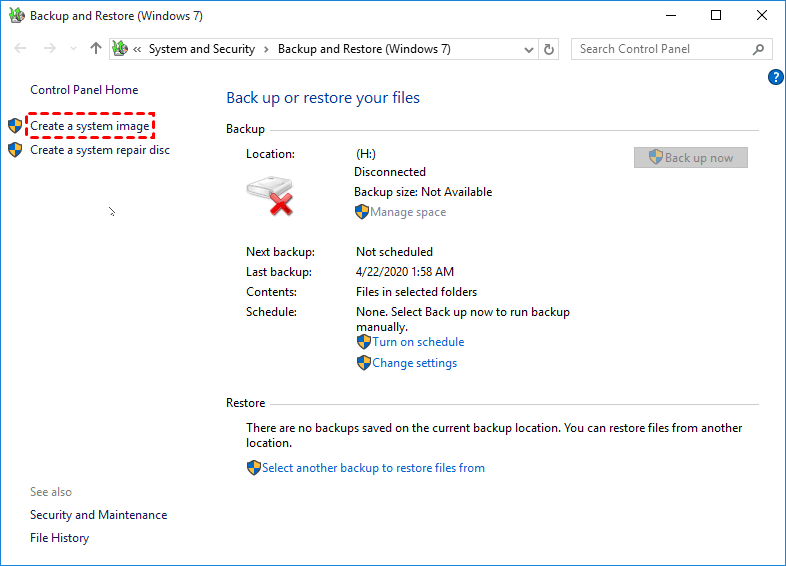
Step 2. Choose Backup and Restore (Windows 7) to open the main console of Backup and Restore.
Step 3. Tap Create a system image at the left side.
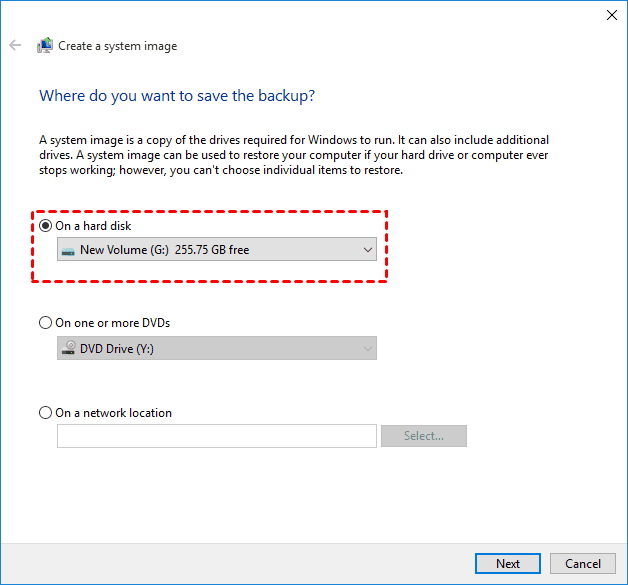
Step 4. Opt for the option: On a hard disk and hit Next.
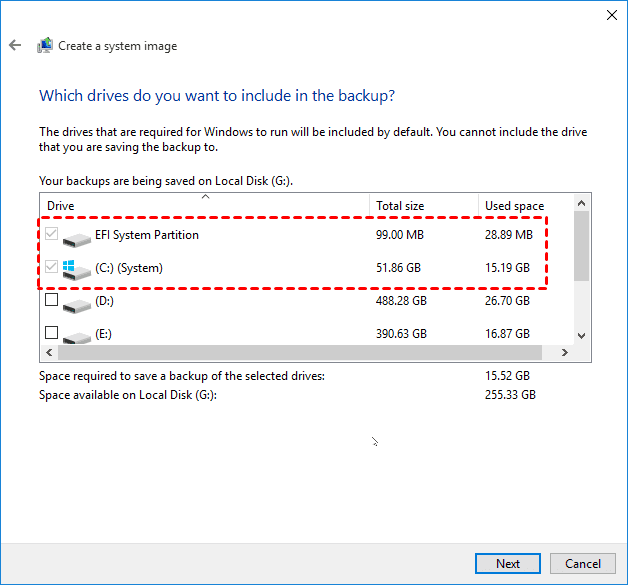
Step 5. Then the partition related to system files and boot files will be selected, like C drive, EFI system partition, Recovery partition, etc. And click Next.
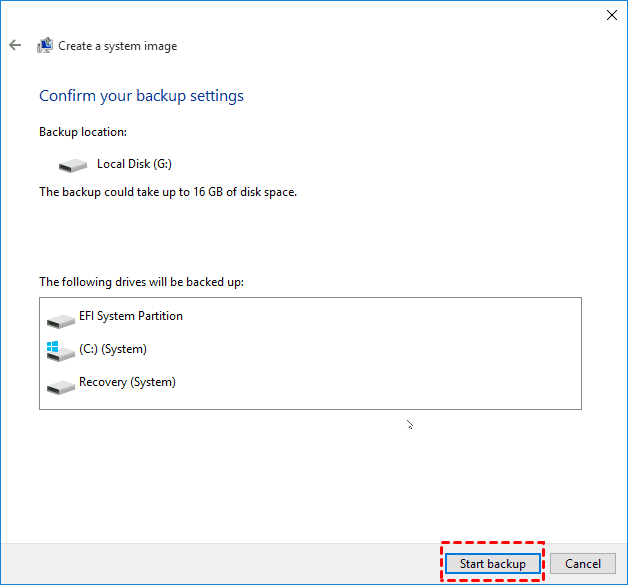
Step 6. Preview the Windows 10 system backup settings and press Start Backup to create a system image right now.
Method 2: Create a Restore Point
A restore point will help you restore computer to previous state if something bad happened to your computer. And you could create a restore point in Windows 10 as follows:
Step 1. Type create a restore point, and choose Create a restore point and hit enter. It will open System Protection tab in System Properties window.
Step 2. Turn On the Protection for your System C: drive.
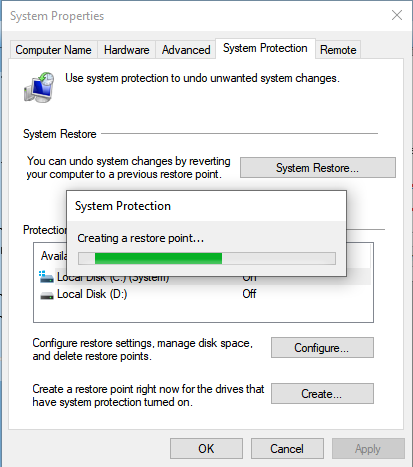
Step 3. Click Create… at the bottom of the window to create a restore point right now.

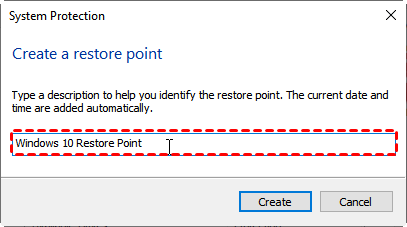
Step 4. Input a description for your current system restore point and then press Create button.
Then it will automatically create a restore point for you.
However, the above two methods could not backup Windows 10 operating system automatically on regular basis, if the changes occurred, you have to manually backup your Windows 10 system again.
Method 3: Create System Backup automatically with AOMEI Backupper Standard
AOMEI Backupper Standard is a free backup software that is available for Windows 10, 8.1, 8, 7, Vista, and XP. It’s capable of backing up Windows operating system, entire hard disk, partition(s) and personal files, as well as clone disk to another disk without losing data, sync files automatically, etc.
Here are the simple steps to create a system image in Windows 10 computer:
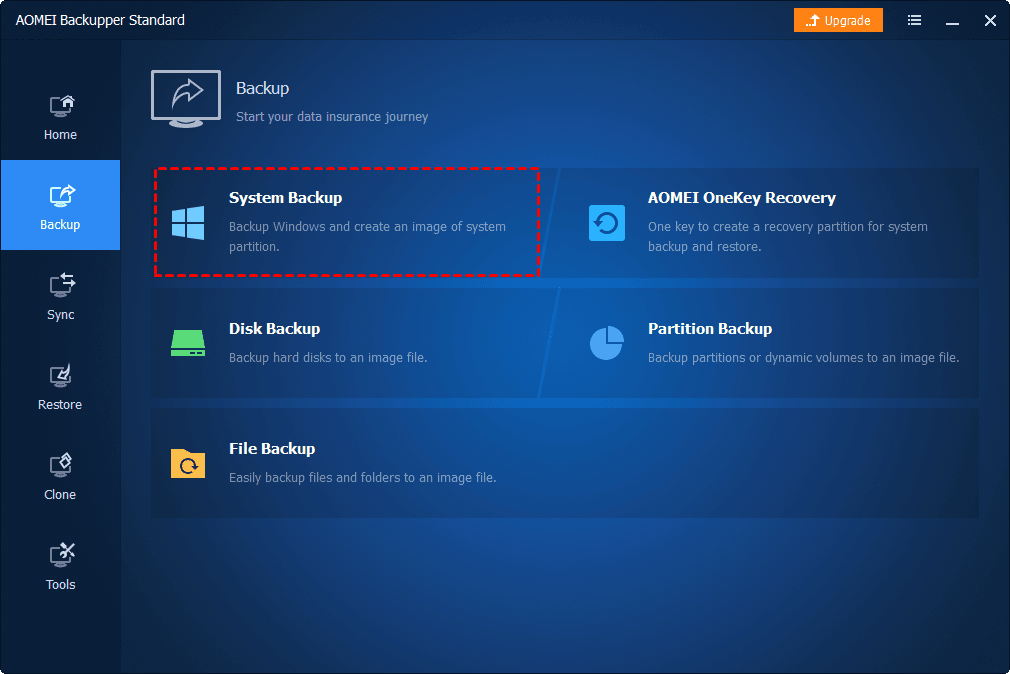
Step 1. Run the free backup software – AOMEI Backupper Standard, and choose Backup tab, then select System Backup.
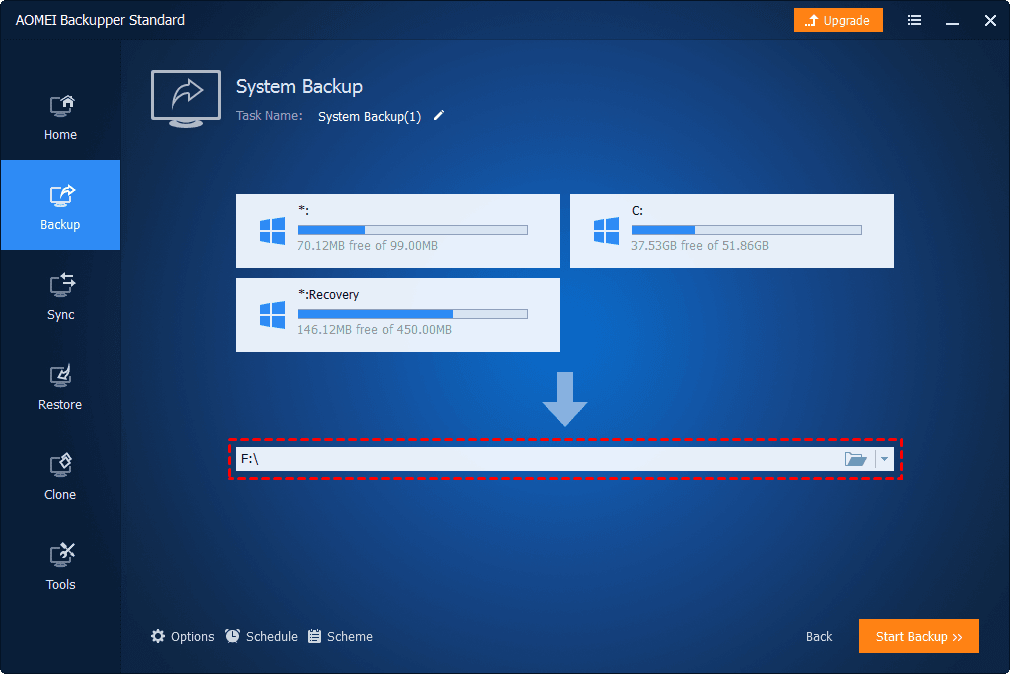
Step 2. Customize the Task Name to differ from others. Choose the external hard drive to save the Windows 10 system backup.
Tip: You could also backup your Windows 10 system files to local disk, USB drive, NAS or network share, etc. If you would like to backup data to cloud, please try free cloud backup solution.
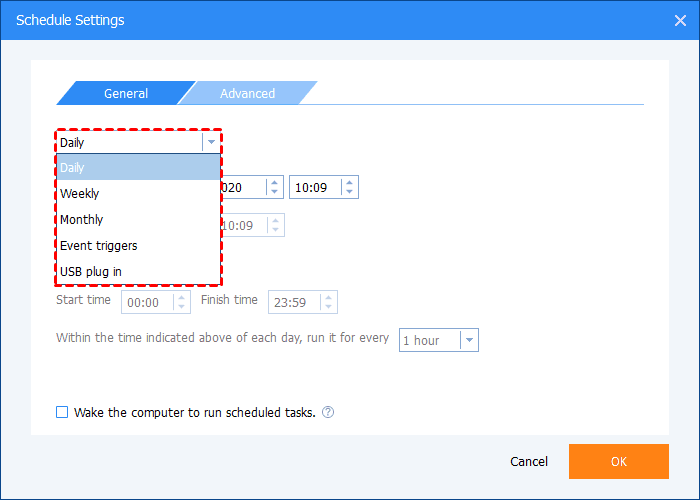
Step 3. Click Schedule, and choose Daily, Weekly, or Monthly in General tab, choose Incremental Backup in Advanced tab to continuously backup your Windows 10 system.
Step 4. Hit Start Backup button, then select Add the schedule and start backup now or Only add the schedule to create a Windows 10 system backup file automatically on regular basis.
Tip: Options also allows you to comment on the Windows 10 system backup task, split, compress the system image file, enable email or SMS notification, use Intelligent sector backup, etc.
Then the program will create a full system image backup for the first time, and create incremental backups in the following specified time. It will save a lot of storage space on your hard disk.
Write in the End
Compared these three free backup software: Create a system image, Create a restore point, AOMEI Backupper Standard. If you just want to create system image one time, you could choose any one of them; If you prefer to create a automatic system image, please try AOMEI Backupper Standard to create Windows 10 system backup.