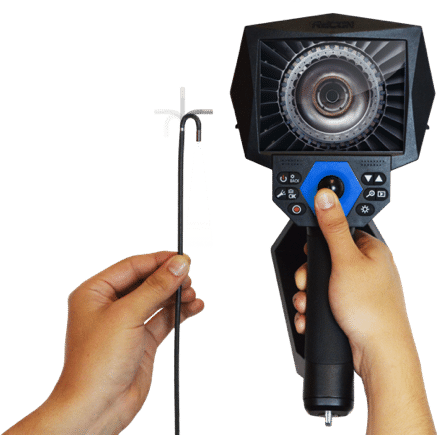
The borescope industry size is estimated to reach $837 million by 2024 at a growth rate of 4.4% from $674 in 2019, according to the GlobeNewswire. Borescopes are some of the most widely used non-destructive testing (NDT) equipment across all industries. A borescope has unique features that help inspectors to inspect and monitor internal components of engines, pipes, and turbines without dismantling them. Using the flexible or rigid tube with a camera on one end and an eyepiece on the other end, you can identify cracks, pits, and other flaws in hard to reach areas.
As technology continues to evolve, inspection cameras are becoming more sophisticated, featuring high definition video cameras attached to a screen. Even more impressive is that today’s borescopes are not used as average inspection tools but as data-based inspection and measurement equipment that provide perfect 3D visualization solutions in all their applications. Here are some developments in 3D video borescopes technology you should know.
Advanced 3D Visualization
Decades ago, inspectors in the aviation and automobile industries relied on stereo and shadow measurement methods to capture two-dimensional (2D) images for measurement calculations. These techniques involved using a non-measurement optical tip and then placing cursors on the 2D image to calculate measurements. Because the measurement tips used in conventional inspection methods had limitations of brightness, depth of field, and field of view, they created room for inaccuracy and inefficient workflow.
In contrast, 3D technologies enable video borescope inspection equipment to compute 3D coordinates at the cursor’s position to measure flaws like dents and coating loss. Factors such as glare, brightness, object distance, and viewing angle affect 3D coordinates’ accuracy. Shadowing, surface contours, and discoloration often misinterpret the viewed surface, leading to improper placement of the cursor.
Fortunately, inspectors can mitigate these risks using 3D point-cloud visualization technology. With 3D point-cloud visualization, you can place the cursor correctly and then calculate the blade to conceal distance.
3D Phase Measurement Tech
3D phase measurement technology integrates bright, full-screen viewing for general visual inspections with on-demand measurement upon finding a defect or indication. That way, it eliminates the need for probe withdrawals to change optical tips, resulting in enhanced accuracy and efficient inspection process. Ideally, 3D phase measurement technology uses a single probe tip to provide accurate 3D scan images. It also ensures indications identified during general inspections are quantitatively analyzed with precision.
Since you don’t need to change the probe tip from a viewing tool to a measurement tip, the inspection process becomes less time-consuming. By using 3D video borescopes, according to www.spiborescopes.com, inspectors can perform full inspections of large aircraft engines and other rotating equipment within a short duration. Moreover, the ability to rotate and zoom 3D images provides inspectors with better visualization of shape and characteristics of defects, resulting in informed decision making.
Advanced 3D Stereo Measurement
Increased probability of detection (PoD) and accurate measurement of identified defects is essential in oil and gas, aerospace, power generation plants, and automobile industries. The 3D stereo measurement technique allows for precise inspection of surfaces in less time than before. It uses a more advanced calibration and processing algorithm, which generates 3D coordinates for every matched pixel before the measurement process. This results in full 3D surface imaging that can be viewed, changed, and assessed.
3D surface images produced by both 3D stereo and phase measurement technology enable the borescope system to display a point-cloud view or three-dimensional point cloud visualization. The three-dimensional data highlights the computed measurements alongside the cursor on the surface maps. This allows inspectors to analyze vital accuracy checks like noise level, data quality, reference-plane accuracy, depth, and cursory placement. These assessment checks are often difficult or impossible to perform using 2D images.
For example, during data accuracy checks, 3D point-cloud images reveal inaccurate data like glare, surface finish, and reflection. This helps an inspector determine if they need to move the cursor away from the inaccuracies or recapture surface maps.
Automated Measurement and Defect Detection
Future developments in 3D video borescope measurements will feature advanced computing hardware and intelligent algorithms to automate measurement and defect detection. New apps have already been developed for specific tasks like blade tip clearance measurement. The software will calculate the maximum, minimum, and average clearance tip of a defined edge once an inspector has selected the engine blade tip location.
Furthermore, advanced 3D measurement technology will measure designated areas using four points to provide minimum, maximum, and average depths or height of corrosion, cracks, pits, and build-up measurement. Aside from reducing inspection and measurement time, advanced 3D video borescope measurement technology will accurately locate critical areas that need more evaluation.
The costs linked with dismantling engines unnecessarily, or allowing cars and planes to function without an out-of-limits condition is the leading factor contributing to advances in 3D video borescope technologies. Advanced optical measurement technologies, for instance, improve accuracy and reduce downtime. They also allow inspectors to make informed decisions based on quality three-dimensional visual data that highlight pitfalls accurately.