Would you like to completely remove the background from an image and leave it transparent so that whatever background it is placed on shows through? Transparent images are fairly common nowadays and are often used in design or for logos, websites, and other purposes.
However if you want to make an image background transparent, you need to first select it precisely and then delete it – which can be tricky and if you’ve tried it in the past you may not have been happy with the result. For an easier way to get the job done however, you should give Movavi Photo Editor a try. I enjoy editing images to improve them or creatively produce various types of looks. I use Movavi Photo Editor for most of my editing needs due to how easy it is to use.
How to Remove an Image Background Using Movavi Photo Editor
In order to use Movavi Photo Editor as a transparent background maker, you should launch it then click on the ‘Browse for Images’ button and select the image that you want to edit. If you prefer you can drag and drop the file into the working area as indicated, which may be more convenient.
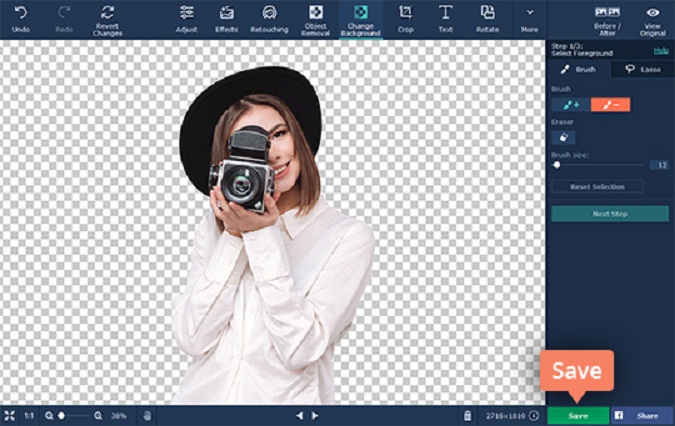
After the image has been loaded into Movavi Photo Editor, click on the ‘Change Background’ tab in the upper part of the interface. In the sidebar you can then select the ‘Foreground Brush’ and use it to mark the subject and foreground area that you want to keep, then select the ‘Background Brush’ to mark the background areas that you want to remove.

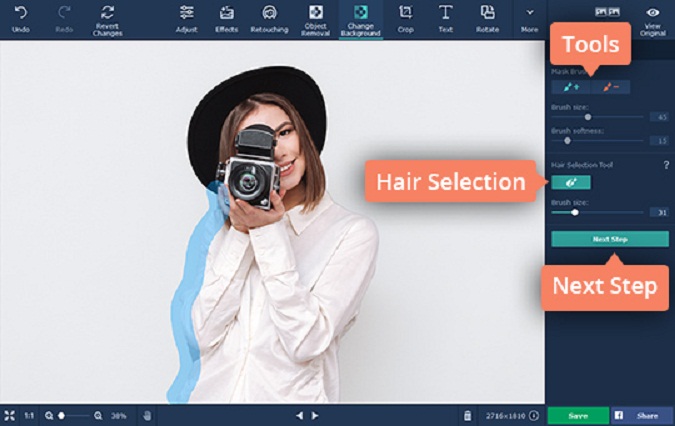
Don’t worry if the selection isn’t precise, as Movavi Photo Editor will let you tidy it up when you click on the ‘Next Step’ button by using the ‘Foreground Mask’ brush and ‘Background Mask’ brush to refine your selection. Some of the other tools that are available could help as well, such as the ‘Hair Selection’ tool that will allow you to more precisely select fine details.
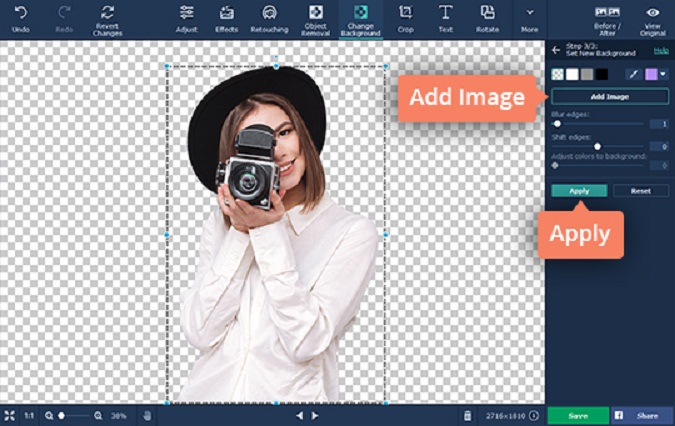
When you’re satisfied with the selection, click on the ‘Next Step’ button once more and Movavi Photo Editor will delete the background from your image. At this point you can click on the ‘transparency’ icon to keep it transparent, or alternatively could click ‘Add Image’ to use a different image as the background.
Once you’re done all that remains is to click ‘Save’ and select the format that you want to use to save your image. Keep in mind that if you want Movavi Photo Editor to save the image with a transparent background you’ll have to choose a format that supports it (such as PNG or GIF). You may also try using eComPicx clipping path and background removal service where eComPicx experts remove the background of your photo perfectly and you will be 100% satisfied.
Aside from that however there are other ways you could improve your images using Movavi Photo Editor as well. Its tools will let you improve the quality of your photos, remove unwanted objects, touch up portraits, apply filters, and perform a wide range of other alterations.
In short not only will Movavi Photo Editor let you create images with transparent backgrounds, but it will also give you the means to edit your photos in any way that you choose. Rest assured all the features in the editor are equally intuitive, and you won’t need much time to figure out how to apply them to your images.