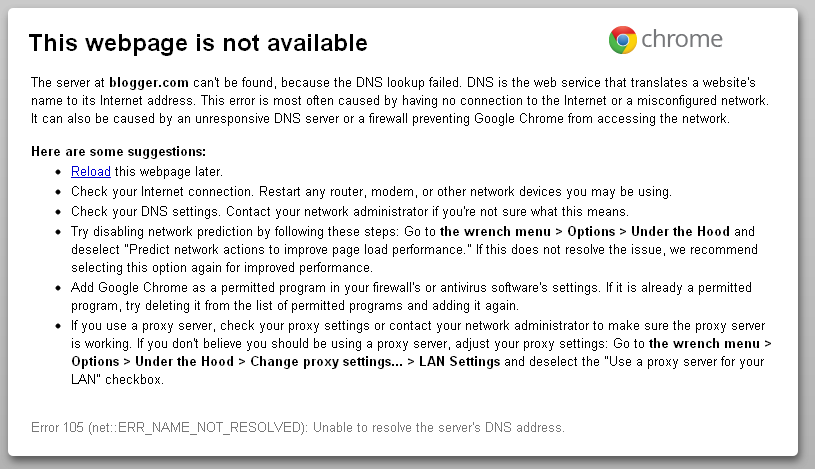
This error message is most common when the browser fails to resolve the server’s DNS address. As you may already know, DNS is a web service that translates a website’s name to its internet address on the servers and a unresponsive DNS server or inability to access the online network may end up showing this error message.
Troubleshooting tips for “This Webpage in Not Available” Error Message in Chrome
- Check your internet connection and try reloading the webpage or go to another page.

- Restart any router, modem, or other network devices you may be using.
- Check your DNS settings and makes sure the server addresses both preferred and alternate are correct.

Contact your ISP or network administrator to know your Preferred DNS and Alternate DSN server addresses.
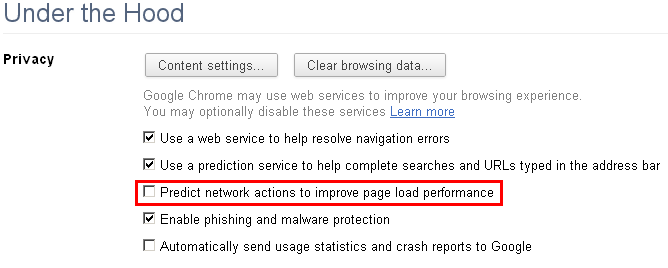
- Customize Google Chrome and try disabling network prediction feature as given below: Go to the wrench menu ► Options ► Under the Hood and deselect “Predict network actions to improve page load performance.”

If this does not resolve the issue, then it is recommended that you select this option again for improved performance.
- Add Google Chrome as a exception program in your firewall’s or antivirus software’s settings so that it is not blocking incoming network connections for Google Chrome.

If it is already added to the list of exception programs and services, then try deleting it from the list and adding it again.
- If you use a proxy server, check your proxy settings to make sure the proxy server is working. You can adjust your proxy settings so as not to use a proxy server even only if you feel it’s unnecessary for your network: Just Go to the wrench menu > Options > Under the Hood > Change proxy settings… > LAN Settings and deselect the “Use a proxy server for your LAN” checkbox.