Microsoft Windows is world’s one most used operating system with 1.5 billion active users. Microsoft Windows was founded in the year 1985 with first version name “Windows 1.0”. In further years Windows developed several versions from which Windows XP becomes a huge success for Microsoft. Recently Microsoft has released Windows 10 with lots of new updates and features. Windows 10 has 400 million active users all around the world. Some of the top features of Windows 10 are as follows:
- New Start Menu
- Cortana on Taskbar
- Xbox App
- Improved Multitasking and Multiscreen
- Simple Unified Settings / Control Panel
These are some of the top trending features which can ease the user’s task, also there are some great administrative tools one of them is “Partition Tool”, this tool helps users to delete, repartition, shrink, expand or format disk. This tool can be useful when you want split disk space into two different drives.
In recent years lots of people come across hacking and that kind of stuff and wanted to make their PC/Laptop dual-boot so they can learn to hack. The basic requirement to learn hacking is installed Linux operating system. Well, if you know anything about Linux you can understand it’s difficult to switch completely from Windows to Linux due to ease of working with Windows and complexity of Linux. Hence everyone is trying to turn their PC/Laptop into a dual boot so that they can learn while working with ease. In order to run dual-boot, you need to have Linux OS installed on the separate drive, but if you have already installed Windows 10 and now you cannot change everything but you can simply split disk space into two different drives to install another operating system. Here is an article showing how to delete/repartition existing drive in Windows 10 without any software.
Precaution: Please take a backup of your data on disk as it will be wiped completely during repartition process. We are not responsible for any loss of your data during the process of repartition existing drive in Windows 10.
How to Delete/Repartition Existing Drive in Windows 10
- Turn your PC/Laptop ON and wait till boot up process is complete to proceed to repartition existing drive in Windows 10 without any software.
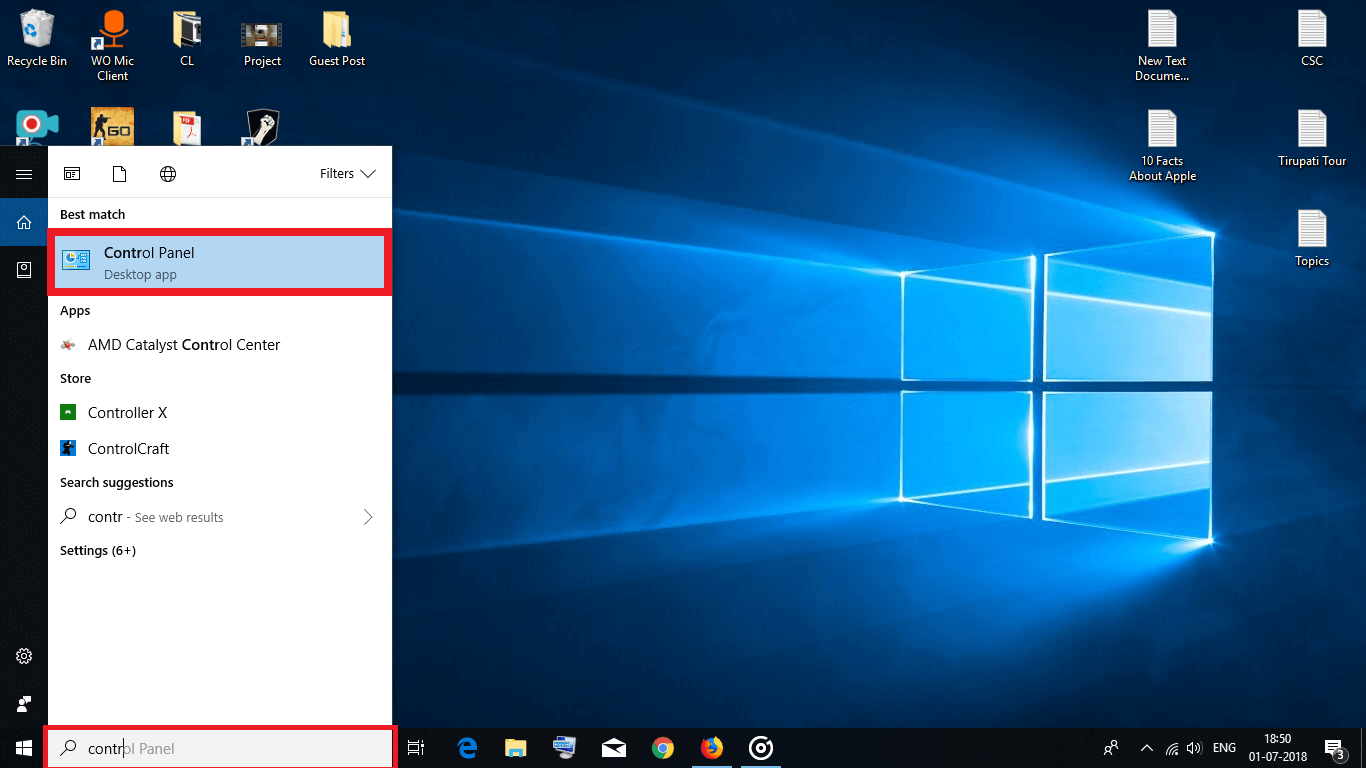
- Now, in the search bar enter “Control Panel” and select the application as shown below.
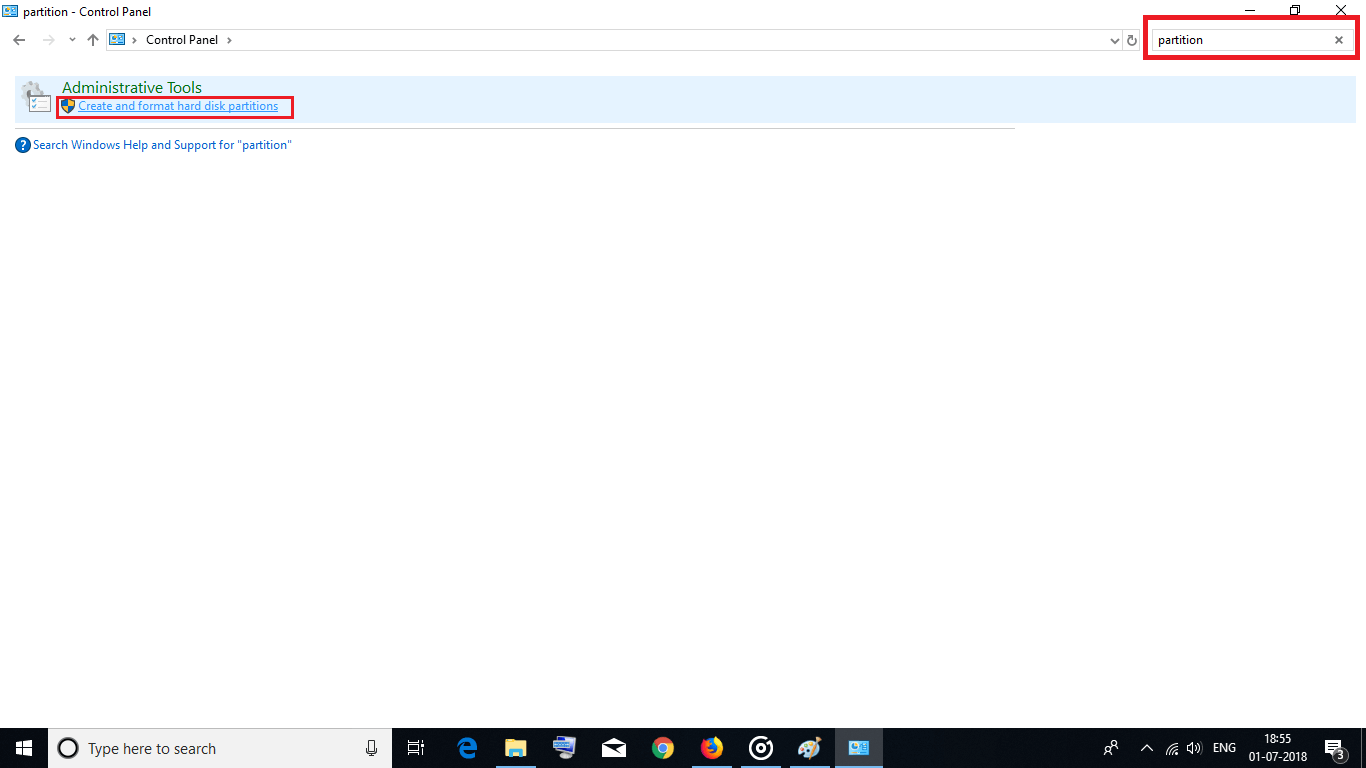
- In Control Panel type “partition” in the search bar and click on the link “Create and format hard disk partitions” under the head “Administrative Tools” as shown below.
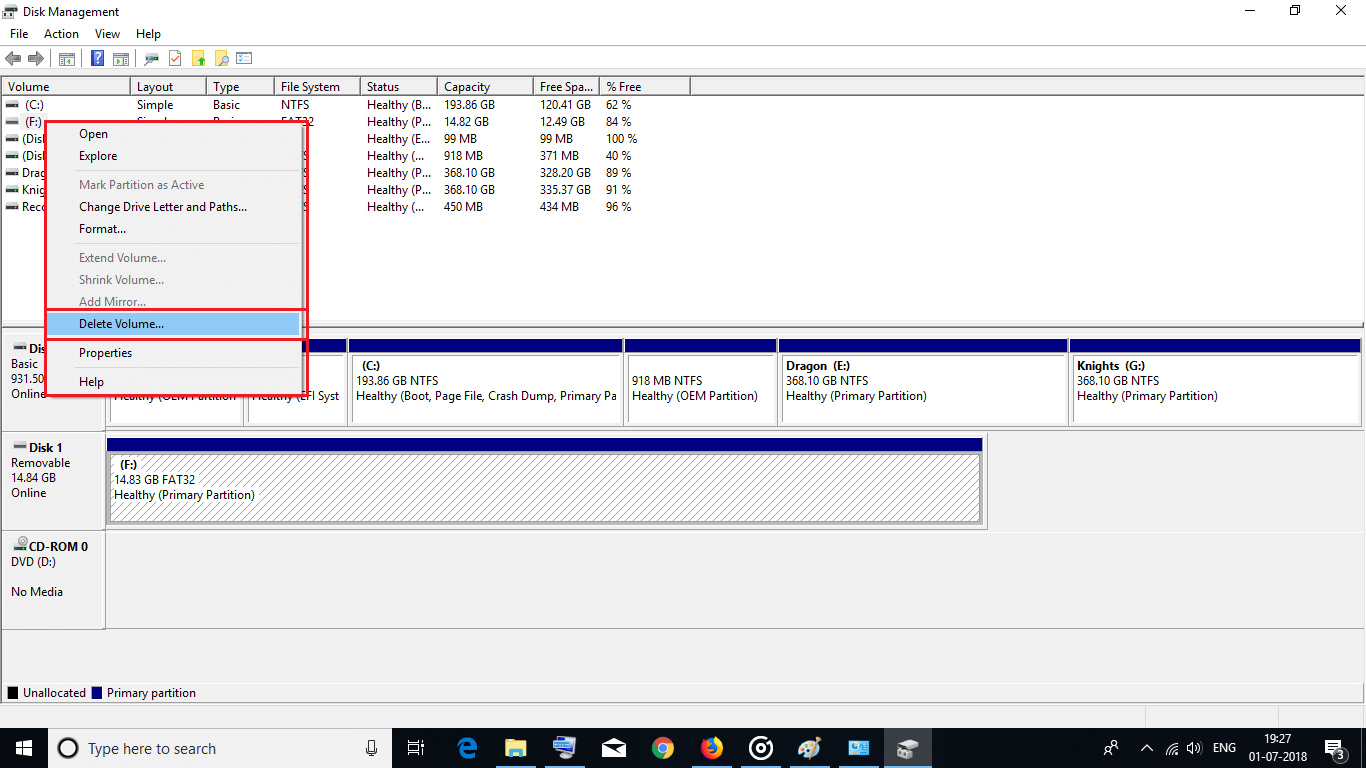
- Once you click the link a new pop up box will open, here in this pop up you will observe two sections. The first section will show the number of partitions you have created during installation of Windows.
- The second section will show you a graphical representation of partitions and their status (Healthy/Damaged/Unallocated) as shown below.

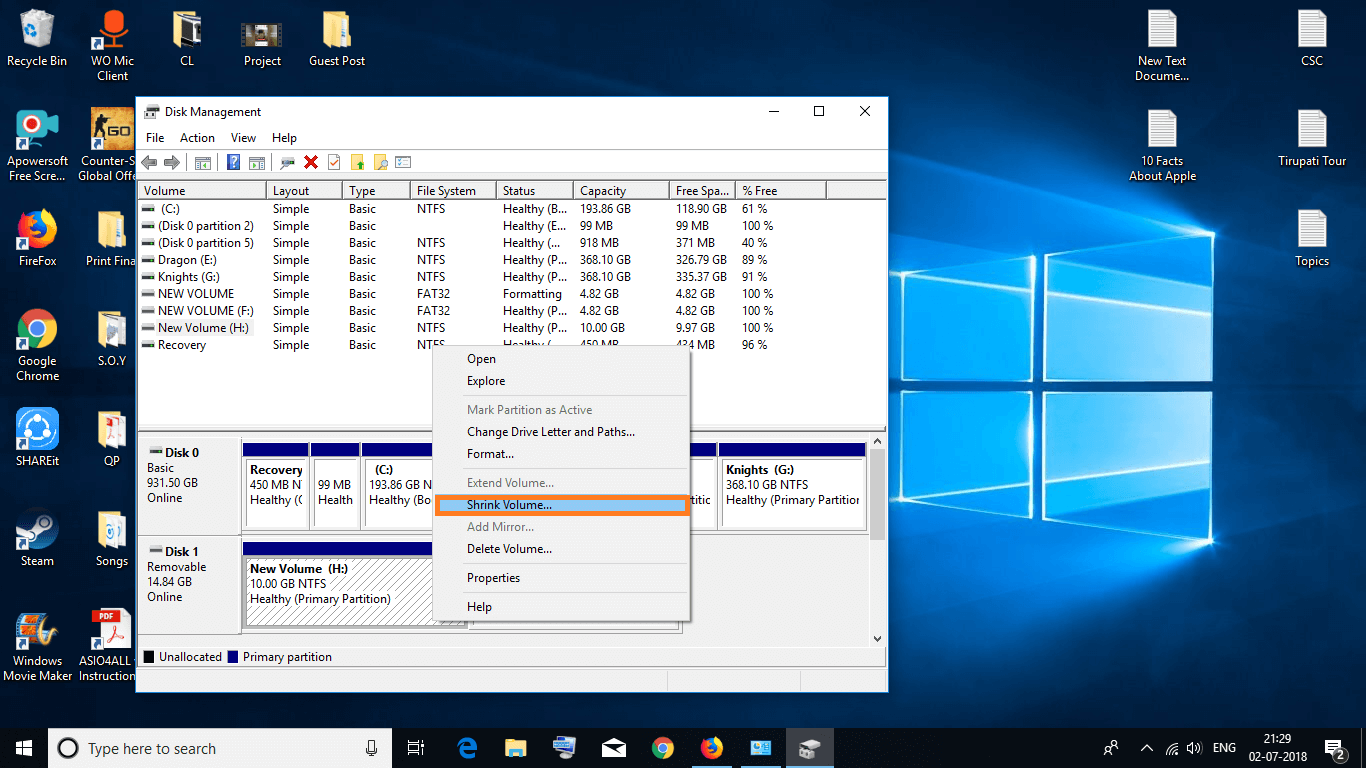
- Now, navigate to section 1 and right-click on the drive you want to delete or repartition and click delete volume as shown below.
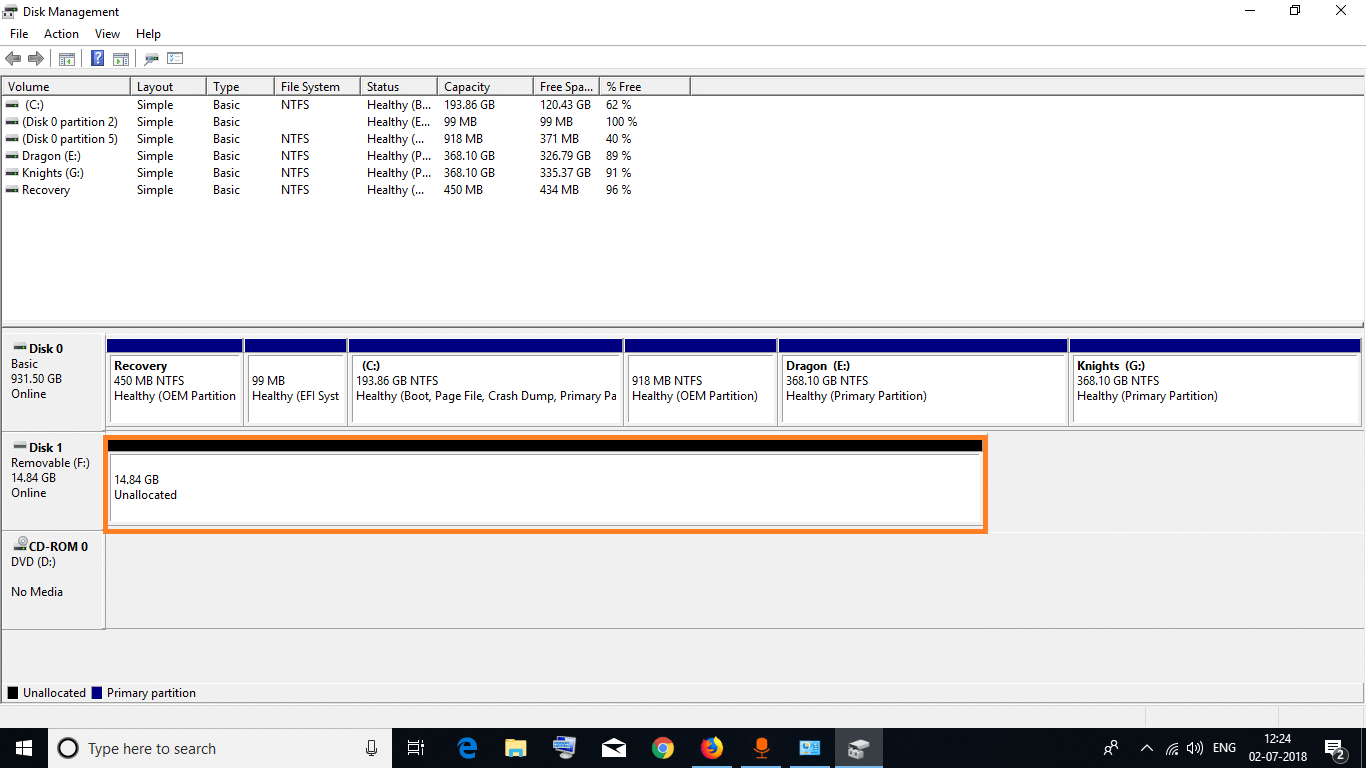
- Once you deleted volume you can see that partition space as Unallocated as shown below.
- Again right-click on that partition and click “New Simple Volume” as shown below.

- Now a pop-up window will open simply click “Next” and enter the size of the partition you want to create in MB and click Next as shown below.

- Here in this section you can assign a suitable letter just like “C” for our system folders likewise and click Next twice and click Finish.
- Wait till process takes time, once the process is complete you can see the changes in your drive space.
- If still there is some unallocated space just repeat above few step in order to repartition existing drive in Windows 10 without any software.
- Now, right click on the drive you just now created and select “Format” and click “OK” twice.
How to Shrink Existing Drive in Windows 10
- Turn your PC/Laptop ON and wait till boot up process is complete to proceed to repartition existing drive in Windows 10 without any software.
- Now, in the search bar enter “Control Panel” and select the application.
- In Control Panel type “partition” in the search bar and click on the link under “Administrative Tools”.
- Once you click the link “Create and format hard disk partitions” a new pop up box will open, here in this pop up you will observe two sections. The first section will show the number of partitions you have created during installation of Windows 10. The second section will show you a graphical representation of partitions and their status (Healthy/Damaged/Unallocated).
- Now right-click on any drive and select “Shrink”.
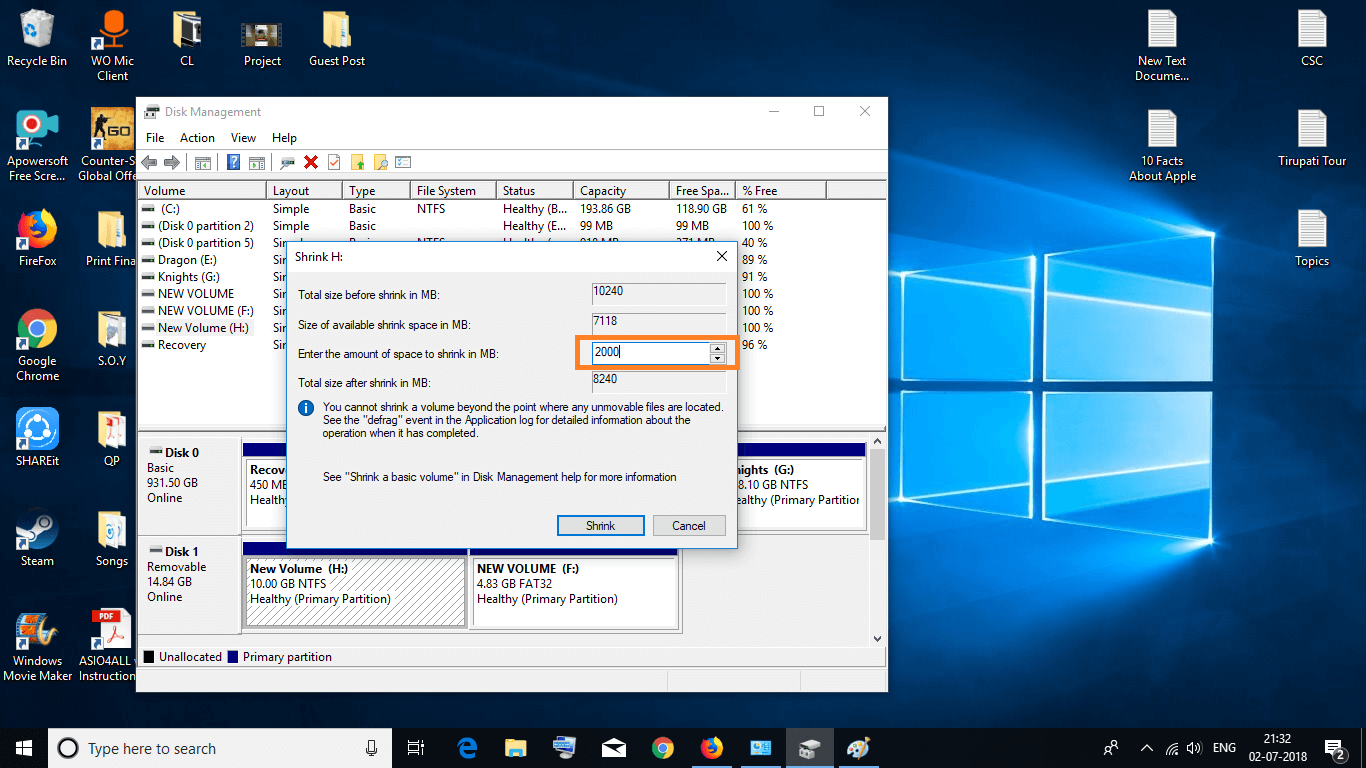
- Enter amount in MB to reduce from total space and click “Shrink” as shown below.
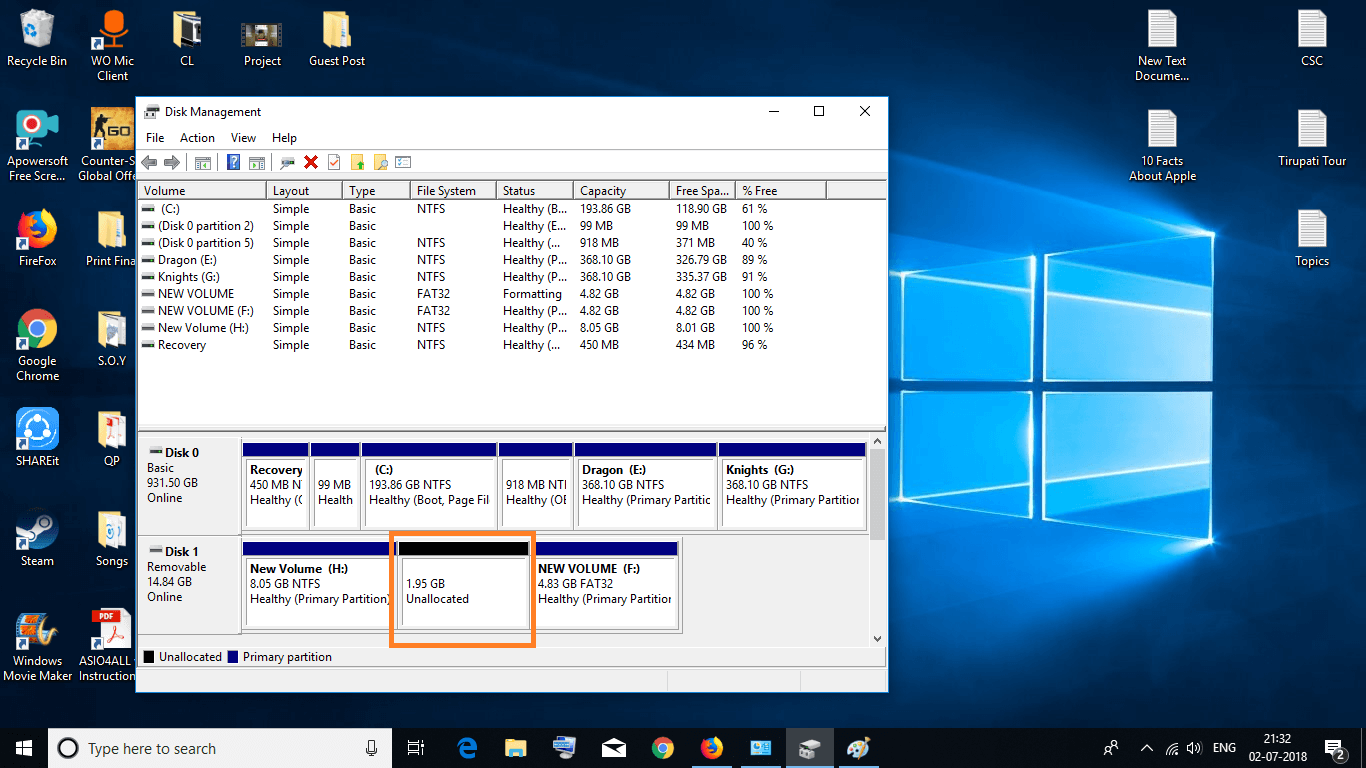
- Once the process is complete you can observe the amount of unallocated space which you enter during shrinking.
- Now, right click on the drive you just now created and select “Format” and click “OK” twice.
In similar way you can expand drive just by clicking expand and following the similar process as of shrinking in the above tutorial. In this way you can repartition existing drive in Windows 10 without any software.
You’ll also like:
This guest post is authored by Vaibhav Kulkarni, CEO of TheStartupMentor.in. He is a blogger and YouTuber (YouTube.com/TheMindFeed) by passion, a civil engineer by profession and traveller by heart. He firmly believes in “Creating jobs rather than asking for one”. You can connect with him on Twitter (@iamvaikul).