Your warehouse is growing. Orders come in faster. Inventory tracking becomes harder. A staff member can’t find a product. Another misplaces an order. Your fulfillment process slows down. Customers complain about delays.
Sound familiar? Most store owners hit this wall eventually. The systems that worked when you processed ten orders daily break down at fifty orders daily. Manual tracking fails at scale.
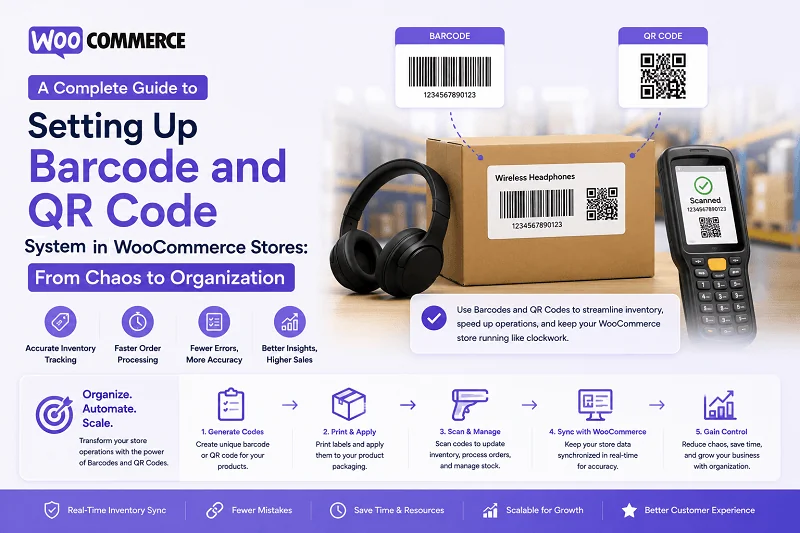
What separates organized, efficient operations from chaotic ones? Often, it’s something simple: a proper barcode and QR code system. Not fancy. Not complicated. Just systematic.
Why Barcodes Aren’t Optional Anymore
Barcodes solve specific, real problems that grow with your business.
When you’re small—ten to twenty orders daily—manual tracking works. You know your products. You remember what’s in stock. Everything stays in your head.
Then you grow. Fifty orders daily. One hundred. Your team expands. New staff don’t know your inventory like you do. They make mistakes. Products get mixed up. Orders get lost. Your reputation takes hits.
A WooCommerce barcode scanner system prevents this. Each product gets a unique identifier. Each order gets trackable code. Scanning replaces guessing. Accuracy replaces chaos.
The numbers are compelling. Warehouses using barcode systems reduce errors by 95%. They process orders 40% faster. Picking errors drop dramatically. Your team works smarter, not just harder.
Beyond efficiency, there’s the customer angle. Orders ship faster. Tracking works better. Customers trust you more. That trust translates to repeat business.
Current Solutions for Barcode Management
Before diving into implementation, understand your options.
DIY Manual System
Some stores create their own system using external tools. Generate barcodes elsewhere. Print them manually. Track them in spreadsheets.
This works for a moment. Then it collapses under its own weight. Staff forgets to update spreadsheets. Barcodes get printed inconsistently. The system becomes unreliable. You’re back where you started.
Third-Party Inventory Services
Services like Vend, ShipStation, or EasyPost handle barcodes. They work. They’re cloud-based. But you’re managing barcodes in one system and WooCommerce in another. Data sync becomes complicated. You pay monthly fees for functionality that could be integrated.
Dedicated WooCommerce Barcode Plugins
Some plugins handle barcodes but offer limited features. Generate codes. Display them. That’s it. No shortcode search. No PDF export. No real integration.
Comprehensive Barcode and QR Code System
This is where everything clicks. A system that lives inside WooCommerce. Generates codes. Searches them. Manages inventory. Exports labels. Auto-generates codes for new products. Works seamlessly with your existing workflow.
This is what the Barcode and QR Code plugin by FmeAddons delivers. It’s not just code generation. It’s a complete operational system.
Understanding the Barcode and QR Code Plugin
FmeAddons built something genuinely useful here. Not feature-bloated. Not underpowered. Just right.
The plugin handles barcodes for both products and orders. You generate WooCommerce QR codes alongside traditional barcodes. You pick from thirteen barcode protocols. You control exactly where codes appear. You export printable labels. You search using shortcodes.
But here’s what makes it different: integration. Everything happens inside WooCommerce. No external tools. No data sync issues. No workflow interruption.
Getting Started: Installation and Initial Setup
Install Like Any WooCommerce Plugin:
- Download the Barcode and QR Code ZIP file from your WooCommerce account
- Navigate to WordPress Admin > Plugins > Add New
- Click Upload Plugin and select your downloaded file
- Install and then activate the plugin
After activation, you’ll find new settings under WooCommerce > Settings > Bar and QR Code. Three main sections appear: Product Barcodes, Order Barcodes, and Barcode Printing.
Setting Up Product Barcodes
This is where your WooCommerce barcode scanner system begins.
Navigate to WooCommerce > Settings > Bar and QR Code > Product Barcodes.
Enable the Feature:
Check “Enable Product Barcodes.” Now the system activates for all your products.
Choose Your Barcode Protocol:
What format should your codes use? You have thirteen options:
- UPC (traditional retail barcodes)
- Code 128 (flexible, works everywhere)
- Code 39 (warehouse standard)
- ITF 14 (shipping industry standard)
- QR Code (smartphone-scannable)
- PDF 417 (high-capacity data)
- Codabar (medical/library use)
- Code 93 (similar to Code 39)
- UPC-E (shorter UPC variant)
- EAN 8 (international, short)
- EAN 13 (international standard)
- Aztec Code (modern alternative)
Most stores use Code 128 or EAN 13 for general retail, QR Code for customer-facing scanning, or Code 39 for warehouse operations. Pick based on your existing scanning hardware or intended use.
Select Your Generation Method:
How should codes be created? Three options exist:
- Product SKU – Use your existing SKU numbers
- Product ID – Use WooCommerce’s internal product IDs
- Custom Field – Map to a custom field you define
Most stores use SKU because SKUs often already exist and are meaningful.
Decide Which Products Get Codes:
You can apply codes to:
- All products at once
- Selected products only
- Specific categories only
Use Include/Exclude logic to refine. Generate codes for all products in the Electronics category except clearance items. Generate codes for all digital products. The flexibility prevents unnecessary code generation.
Enable Missing Barcodes Only:
Check this if you have products already coded elsewhere and want to skip regenerating those. The system only creates codes for products missing them.
Configure Auto-Generation:
Check “Auto Apply on New Product” and every product added to your store automatically gets a barcode generated. No manual work. Consistency guaranteed.
Display Settings:
- Check “Show Barcode in Product Page” to display codes on your storefront
- Check “Show Barcode in Order Emails” so customers see what they ordered (helpful for digital products and subscriptions)
Now click the “Generate Barcodes” button. The system creates codes for all qualifying products. Go grab coffee. This takes a moment on large catalogs.
Setting Up Order Barcodes
Orders need tracking too. Navigate to WooCommerce > Settings > Bar and QR Code > Orders Barcodes.
Enable Order Barcodes:
Check the enable checkbox.
Choose Order Barcode Format:
Same protocol options as products. Most stores use the same format for both, but you can differ if your warehouse equipment requires it.
Generation Method:
Three options:
- Order ID – WooCommerce’s internal order number
- Order Number – Your custom order numbering system
- Custom Field – Your own field mapping
Order ID is typical. Simple. Reliable. Maps directly to WooCommerce data.
Auto-Apply Settings:
Enable “Auto Apply on New Order” so every order gets a barcode automatically. Your staff never encounters an untracked order.
Display in Admin:
Check “Show Barcode in Admin Order Page” so staff sees the code when fulfilling orders.
Check “Show Barcode in Order Emails” if you want customers to see their order barcode (useful if they’ll bring the barcode to pickup locations).
Generate order barcodes using the button.
Exporting Printable Barcode Labels
Now you have codes. You need labels.
Go to WooCommerce > Settings > Bar and QR Code > Barcode Printing.
Configure Label Layout:
- Set the number of columns for your label sheets (typically 2, 3, or 4 depending on your printer)
Choose What Info Appears on Labels:
For products, include:
- Product Images
- Product Titles
- Product Prices
- Product SKUs
- Product Descriptions
For orders, include:
- Order Numbers
- Order Totals
- Order Dates
- Customer Names
- Order Status
Select only what your warehouse actually needs. Cluttered labels are useless labels.
Download Your PDF:
Click “Download PDF” to generate a printable sheet. Print immediately or save for later. These labels stick to products and boxes.
For order labels, specify your order range. Print orders 1-100 today. Print orders 101-200 tomorrow. Batch processing speeds up fulfillment.
Using WooCommerce QR Codes for Scanning
Beyond printed labels, WooCommerce QR codes serve real operational purposes. Your staff can scan codes to instantly retrieve product or order information.
Use the shortcode feature to enable this. Navigate to WooCommerce > Settings > Bar and QR Code > Shortcode Settings.
Product Barcode Shortcode:
The shortcode [fme_product_barcode] creates a search interface for products. Place it on any page.
Configure:
- Which user roles can access it (staff only, or customers too?)
- Whether scanning should reduce stock automatically
- Whether an “Add to Cart” button should appear
This lets warehouse staff scan a product barcode and instantly see stock levels. Reduce stock as they pick items. Inventory updates in real-time.
Order Barcode Shortcode:
The shortcode [fme_order_barcode] enables order lookup. Staff scan an order barcode. The system pulls up that order.
Configure:
- Which user roles access this
- Whether processing buttons appear
- How order status changes when scanned
A picker scans an order. The system shows which products to pick. They pick and scan again. Status updates to Processing. No manual data entry. Scanning handles everything.
Product-Level Customization
Sometimes one product needs different settings than your global defaults.
Go to any product’s edit page. Under Product Data, find the Product Barcode section.
Here you can:
- Override global settings for this specific product
- Use a different barcode protocol just for this item
- Enter custom barcode content
- Generate, print, or delete the code immediately
This matters for special cases. A seasonal product might use a temporary code. A high-value item might use a different protocol. A partner product might use their own code. Flexibility exists.
Real Workflow: From Order to Shipment
Here’s how this actually works in practice:
Order Arrives:
A customer orders a laptop and three accessories. The order gets a barcode automatically.
Pick Process:
Your picker receives the order. They scan the order barcode on their mobile device using the [fme_order_barcode] shortcode.
The system displays what’s in the order. The picker walks to the laptop section. They scan the laptop’s product barcode. Stock reduces by one automatically. They grab three accessories. Each scan reduces stock.
Packing:
The picker brings all items to packing. They print a packing slip with the order barcode. They verify everything matches. All items get placed in a box.
Shipping:
The box gets the order barcode label. Your carrier scans it. Tracking works. Customers can track their shipment.
Returns:
If a customer returns the item, they scan the barcode on the return label. Your system knows exactly which order is returning. Stock increases automatically.
No spreadsheets. No guessing. No miscommunication. The barcode moves information around efficiently.
Solving Common Setup Challenges
“Our Scanners Don’t Work with QR Codes”
No problem. Use Code 128, Code 39, or another traditional format. Your hardware probably supports it.
“We Already Have Custom Barcodes”
Use the Custom Field option. Map to your existing barcode field. The plugin generates based on what’s already there.
“We Need Different Codes for Different Warehouses”
Generate codes globally. Use product-level settings to override for warehouse-specific needs. Or use different custom fields per warehouse and swap which field the plugin reads from.
“Our Scanning Equipment is Ancient”
Test compatibility. Most devices support Code 128 and EAN 13. If your hardware is truly ancient, use Code 39. It’s been around forever. Everything supports it.
“We Forgot to Generate Codes on Existing Products”
Check “Enable Missing Barcodes Only” and run the generation again. The system only creates codes for products lacking them. No duplicates.
Measuring Success
After implementation, track what improves:
- Order processing time (usually drops 30-40%)
- Picking accuracy (typically improves to 99%+)
- Stock count accuracy (usually reaches 98%+)
- Customer complaint rate (typically decreases)
- Staff confidence and morale (noticeably improves)
These metrics show whether your system is working. If they’re not improving, troubleshoot. Most issues come from incomplete setup or staff not using the system consistently.
Final Steps
Start small. Generate barcodes for your twenty best-selling products. Set up the shortcode search on a staff-only page. Print labels. Have one staff member test the workflow. Get feedback. Fix issues.
Then expand. Generate barcodes for all products. Train all staff. Implement order barcodes. Watch your operation transform.
A barcode and QR code system isn’t glamorous. It won’t win you a design award. But it will make your business work better. It reduces errors. It speeds operations. It makes customers happier. And that matters more than flashy features.
Your future self—the one running a much larger business—will thank you for implementing this now.